A step By step Bond Cleaning Checklist For Hobart Tenants
Here’s a tip most tenants miss: clean from top to bottom i.e., ceiling fans first and floors last. It will save you hours of rework. This is just one of the many things you can do to ensure you’re cleaning your Hobart rental home properly for the upcoming final inspection. Paying attention to the order as well as to what you are cleaning will make this process smoother and help you avoid those frustrating last minute touch ups. A little planning and the right cleaning checklist can ensure that all surfaces in your home meet the property manager’s standards.
This guide will walk you through a complete step by step checklist of items to clean in your Hobart rental property, so that you can secure your bond refund during move out. Whether you are moving out of a cosy apartment or a larger rental, this checklist covers everything from kitchens to outdoor spaces. For anyone searching for expert guidance on carrying out a budget bond cleaning Hobart, you’ll get a succinct breakdown of what to clean, when to clean and how to leave your home spotless. Let’s start.
Hide
Show
]- Start With A Solid Plan And The Right Supplies
- Prioritise Deep Cleaning the Kitchen Before Inspection
- Clean Bathrooms and Laundry Areas Thoroughly
- Spotless Living Areas, Bedrooms and Hallways
- Don’t Forget Cleaning the Outdoor Areas
- Check Fixtures, Fittings and Final Touches
- Common Mistakes to Avoid During Bond Cleaning
- Infographic: Bond Cleaning Checklist for Hobart Tenants
- Wrapping Up
1. Start With A Solid Plan And The Right Supplies
Before diving into the cleaning itself, it’s important to have a plan in place. Bond cleaning can be a time consuming task, so scheduling your cleaning over a few days will save stress and prevent last minute rushes. Make a list of each room and the areas within them that need attention; from ceiling to skirting board.
Stock up on quality cleaning products before you begin. You’ll need microfibre cloths, a good vacuum, mop and bucket, sponges, a stiff brush, oven cleaner, glass cleaner and disinfectant. Ecofriendly products are ideal, particularly in Tasmania, where sustainability is important. Also, remember to bring rubber gloves and a step ladder for those high locations. You can also contact expert bond cleaning Hobart to make the process even easier.
Tip: Take time stamped images of the cleaned rooms prior to inspection to avoid future conflicts.
2. Prioritise Deep Cleaning the Kitchen Before Inspection

Agents usually begin their inspections in the kitchen so be thorough. Begin with the oven, as degreasing agents require time to operate. Remove the racks and trays, immerse them in hot soapy water, and remove any charred residue. Clean the oven walls and glass door thoroughly. Next, clean the stovetop and rangehood filters, which collect grease quickly. To remove oil stains, thoroughly clean the backsplash and surrounding tiles.
Don’t forget to pull out and clean underneath your appliances like the fridge and dishwasher where dirt can sneak in and build up without you noticing. And don’t skip the cabinets; give them a good wipe down inside and out. For the sink, a mix of baking soda and vinegar works wonders, and don’t forget to shine up all your stainless steel fixtures. By the time you’re done, your kitchen will be spotless, fresh and free of any odours, ready to impress even the most picky agent.
3. Clean Bathrooms and Laundry Areas Thoroughly
Bathrooms can thrive mould, soap scum and water stains. Start by applying mould remover or white vinegar to grout lines, tiles and shower screens. Allow it to sit before scrubbing with a stiff brush. Clean the shower head, taps and fixtures until they shine. Next, tackle the toilet including behind the base and under the seat; they’re often checked closely. Use a disinfectant and wipe the exterior thoroughly.
Don’t forget the sink basin, mirrors and cupboards. In the laundry room, clean the lint filters in the dryer, give the washing machine drum a good wipe and remove any detergent residue from the shelves. Finish it off by mopping the floors and leaving all surfaces in these rooms completely dry.
4. Spotless Living Areas, Bedrooms and Hallways
When it comes to the rest of the house, start high and work your way down. Wipe down ceiling fans, air vents and light fittings. Dust accumulates quickly in these areas and can easily be missed. Clean all window frames, tracks and flyscreens; these are common problem areas during inspections. Wipe over doors, handles and switches with a damp cloth, and clean walls to remove fingerprints or scuff marks. For windows, use a streak free glass cleaner on both sides if accessible.
Vacuum carpets thoroughly and, if required, hire a carpet cleaning machine or arrange for professional steam cleaning. Most Tasmanian rental agreements demand this, especially if you have pets. Curtains and blinds also require cleaning; dust or vacuum them thoroughly. Finally, mop the hard floors to remove any streaks or sticky residue.
5. Don’t Forget Cleaning the Outdoor Areas
Tenants may disregard cleaning their outdoor spaces but agents will not. If your property has a balcony, patio or yard, clean them up before the inspection. Sweep and hose down all hard surfaces, and clean any cobwebs from the walls and ceilings. Mow the lawn, trim the hedges, and pull weeds from the garden bed. Empty and wash outside bins to avoid unpleasant odours.
If you have outdoor furniture, give it a quick clean, too. A neat, well kept exterior creates a strong first impression before the agent even steps inside. This attention to detail is what separates a standard clean from a quality bond cleaning Hobart job. It shows respect for the home and makes your final inspection, smoother and more likely to end positively.
6. Check Fixtures, Fittings and Final Touches
Once all of the primary cleaning has been completed, it is time to add the finishing touches. Check that the light bulbs are operating, the curtain rails are intact, and the door stoppers are not broken. Tighten any loose screws on handles or hinges if possible. If your walls have small picture hook marks or minor scuffs, patch them up with matching paint or filler (but make sure you have permission before doing this).
Replace any damaged items you’re responsible for; it’s cheaper than having the landlord deduct repair costs from your bond. Finally, take one last walk through with your checklist in hand. Inspect each space in bright light, open cabinets, and look behind doors. This guarantees that nothing has been overlooked, and offers you confidence before the final inspection.
7. Common Mistakes to Avoid During Bond Cleaning
Even with the best intentions, tenants frequently make mistakes that lose them a portion of their bond. The most common are:
- Cleaning in the wrong order, starting with floors instead of high surfaces.
- Forgetting to clean areas like window tracks and behind appliances.
- Using the wrong cleaning solutions can harm surfaces.
- Leaving strong chemical odours or residue behind.
- Overlooking exterior cleaning such as cobwebs or garden waste.
Avoiding such pitfalls is just as vital as cleaning itself. Real estate agents appreciate bond cleaning Hobart tenants who take the time to double check every detail.
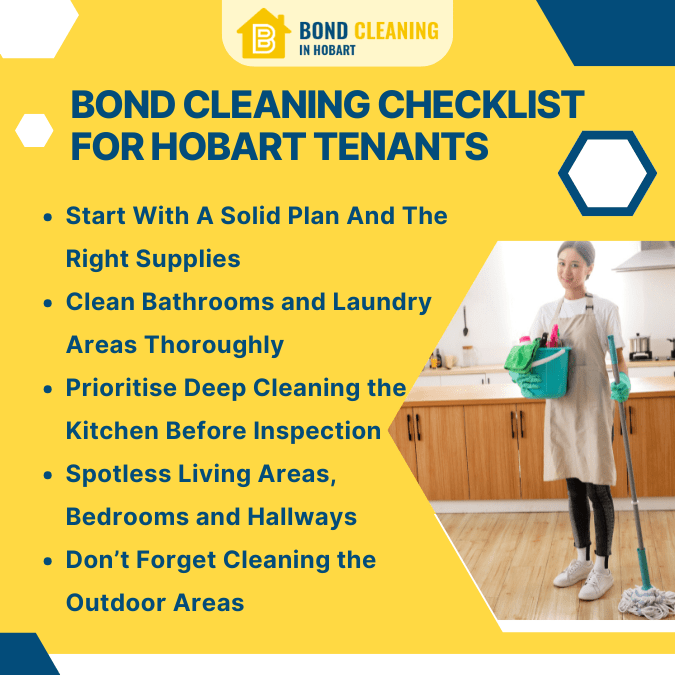
Infographic: Bond Cleaning Checklist for Hobart Tenants

Wrapping Up
Bond cleaning is necessary for a smooth transition and secure bond deposit. With this checklist you will be able to clean systematically, save time and meet the high expectations of Hobart’s property managers. Whether you do this cleaning on your own or hire professionals, careful preparation and attention to detail will make a big difference to the inspection outcomes. With the correct mindset and a little elbow grease, you may conclude your tenancy on a good note, leaving with your entire bond intact and stress free.

